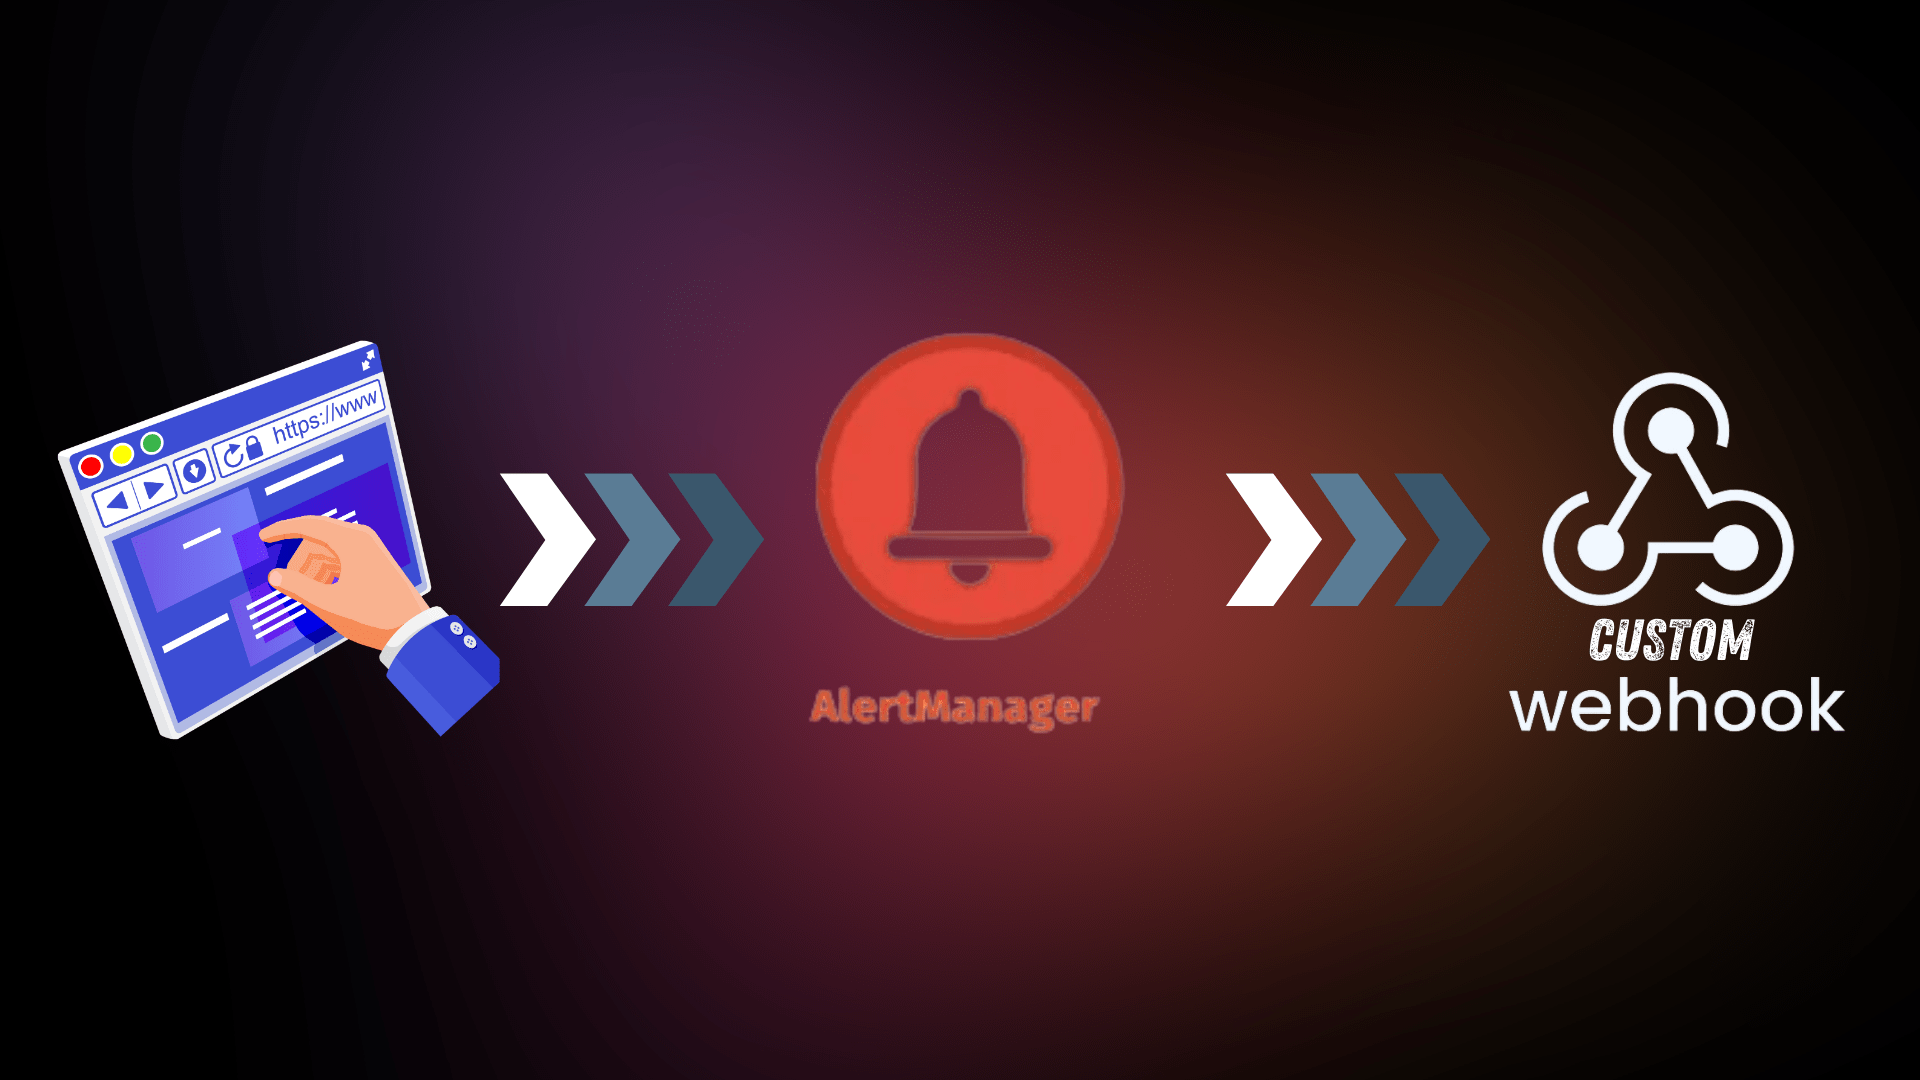
Managing alerts in Kubernetes is crucial for ensuring system reliability, but handling duplicate or unrelated alerts can be a challenge. With Alertmanager, you can customize alert routing to trigger specific webhooks while grouping and deduplicating alerts.
This guide walks you through setting up Alertmanager to send grouped alerts to custom webhooks and test them with real examples.
You can send your raw metrics/alerts to the alertmanager’s /api/v2/alerts endpoints which then will be served by alertmanager and processed further
Why Use Alertmanager with Custom Webhooks?
Using webhooks with Alertmanager allows you to:
- Integrate seamlessly with other tools like incident management systems.
- Route alerts dynamically to different endpoints (e.g., Slack, monitoring dashboards, or custom APIs).
- Simplify alert notifications by grouping and deduplicating similar alerts
Step-by-Step Guide
1. Install Alertmanager in Kubernetes
First, install Alertmanager using Helm, a package manager for Kubernetes:
Add the Helm repository:
helm repo add prometheus-community https://prometheus-community.github.io/helm-charts
helm repo update
Install Alertmanager:
helm install alertmanager prometheus-community/alertmanager --namespace alertmanager --create-namespaceVerify the installation:
kubectl get pods -n alertmanagerEnsure the alertmanager-0 pod is running.
2. Expose Alertmanager as a NodePort Service
To make Alertmanager accessible, change its service type to NodePort.
Edit the Service:
kubectl edit svc alertmanager -n alertmanagerModify the Service Type:
Change:
type: ClusterIPTo:
type: NodePortGet the NodePort URL:
Check the service details:
kubectl get svc alertmanager -n alertmanagerExample output:
NAME                      TYPE          CLUSTER-IP      EXTERNAL-IP         PORT(S)                   AGE
alertmanager  NodePort   10.100.200.123   <none>                     9093:32767/TCP    5m
Use the NodePort (32767 in this case) and the Node IP (get it via kubectl get nodes -o wide) to access Alertmanager at http://<NodeIP>:<NodePort>.
3. Configure Grouping, Deduplication, and Webhooks in alertmanager.yml
The heart of Alertmanager is its configuration file. We’ll set up grouping and deduplication and route alerts to custom webhooks.
Step 1: Edit the Configuration
Edit the Alertmanager configuration stored in a ConfigMap:
kubectl edit configmap alertmanager -n alertmanagerStep 2: Add Grouping and Webhook Logic
Replace the configuration with the following example:
global:
  resolve_timeout: 5m

route:
  group_by: ['alertname', 'severity']    # Group alerts by alertname and severity
  group_wait: 10s                        # Wait before sending the first alert in a group
  group_interval: 5m                     # Wait before sending updates for the same group
  repeat_interval: 3h                    # Repeat alert notifications every 3 hours
  receiver: 'default-receiver'           # Default receiver for ungrouped alerts
  routes:
    - match:
        severity: 'critical'
      receiver: 'critical-receiver'      # Route critical alerts to a separate webhook
    - match:
        severity: 'warning'
      receiver: 'warning-receiver'       # Route warning alerts to another webhook

receivers:
  - name: 'default-receiver'
    webhook_configs:
      - url: 'http://default-webhook-url.com'      # Replace with your default webhook

  - name: 'critical-receiver'
    webhook_configs:
      - url: 'http://critical-webhook-url.com'     # Replace with your critical webhook

  - name: 'warning-receiver'
    webhook_configs:
      - url: 'http://warning-webhook-url.com'      # Replace with your warning webhook

inhibit_rules:
  - source_match:
      severity: 'critical'
    target_match:
      severity: 'warning'
    equal: ['alertname']                  # Suppress warning alerts if critical alerts exist

templates:
  - '/etc/alertmanager/*.tmpl'
- Webhooks (
webhook_configs): Define the URLs where grouped alerts will be sent. - Grouping: Combine alerts with the same
alertnameandseverityinto a single notification. - Inhibit Rules: Prevent lower-priority alerts (e.g.,
warning) from triggering if higher-priority alerts (e.g.,critical) exist for the same issue.
Save and exit the editor.
Step 3: Restart Alertmanager
Restart the pod to apply the changes:
kubectl delete pod -l app.kubernetes.io/name=alertmanager -n alertmanager4. Test the Setup
Send Test Alerts
Use curl to simulate grouped and deduplicated alerts:
curl -X POST http://<alertmanager-service-url>/api/v2/alerts \
  -H "Content-Type: application/json" \
  -d '[{
        "labels": {"alertname": "CPUHigh", "severity": "critical", "instance": "server1"},
        "annotations": {"summary": "High CPU usage on server1"}
      },
      {
        "labels": {"alertname": "CPUHigh", "severity": "critical", "instance": "server1"},
        "annotations": {"summary": "Duplicate high CPU usage on server1"}
      },
      {
        "labels": {"alertname": "MemoryHigh", "severity": "warning", "instance": "server2"},
        "annotations": {"summary": "High memory usage on server2"}
      }]'
Check Webhook Endpoints
- Critical Webhook: Receives a single grouped alert for
CPUHigh(deduplication in action). - Warning Webhook: Receives the alert for
MemoryHigh.
5. Debugging and Monitoring
- If alerts don’t appear, check the logs:
kubectl logs -l app.kubernetes.io/name=alertmanager -n alertmanagerTest webhook endpoints using tools like Beeceptor or a custom API to verify incoming data.
Yes, Alertmanager supports various integrations like slack_configs and pagerduty_configs.
Use tools like Beeceptor to test webhook endpoints or check Alertmanager logs for errors.
Yes, Use and modify the configs accordingly | Concepts remains the same
By following this guide, you’ve streamlined alert management in Kubernetes and gained better control over your notifications. For more Kubernetes tutorials, subscribe to our blog and stay updated!