📌 Introduction
If you’re in the security or DevSecOps space, you already know the importance of managing vulnerabilities effectively. DefectDojo, an open-source application vulnerability management tool, helps teams track and triage findings from various security scans. But to supercharge your workflow, integrating it with Jira—the industry-standard issue tracking platform—is a game-changer.
In this blog, we’ll walk you through the DefectDojo and Jira integration process, covering:
- ✅ Prerequisites
- 🔧 Configuration steps
- 🔁 Synchronization behavior
- 🛠️ Common issues and how to fix them
Let’s integrate defectdojo with Jira
⚙️ Why Integrate DefectDojo with Jira?
Here are the top benefits:
- Automatically create Jira issues from security findings
- Track remediation workflows from detection to resolution
- Eliminate manual duplication of vulnerabilities into Jira
- Enhance communication between security and development teams
🧱 Prerequisites
Before starting the integration, ensure the following:
- You have admin access to both DefectDojo and Jira
- Jira project is already set up (Company Managed Project Only)
- Jira API token or username/password (for Jira Server)
- Your DefectDojo instance is up and running (v2.1+ recommended)
🔗 Step-by-Step: DefectDojo and Jira Integration
1. 🧭 Navigate to Jira Configuration in DefectDojo
- Go to your DefectDojo dashboard
- Under “Configuration”, select “JIRA”
If you dont see JIRA option inside configuration go to System Settings find the enable jira integration checkbox
2. 📝 Add New Jira Configuration
- Click “Add Jira instance Advanced”
- Fill in the following:
- Jira URL (e.g.,
https://your-domain.atlassian.net) - Email/Username
- Issue template dir
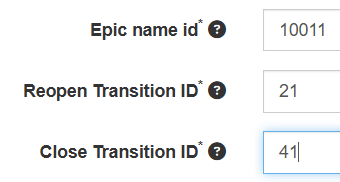
- Epic name ID*
- Reopen Transition ID*
- Close Transition ID*
- API Token / Password
- Project Key (e.g.,
SEC) - Issue Type (e.g.,
Bug,Task) - Optional: Jira custom fields mapping (for labels, severity, etc.)
- Jira URL (e.g.,
You can find your EPIC NAME ID | REOPEN TRANSITION ID | CLOSE TRANSITION ID by following below steps
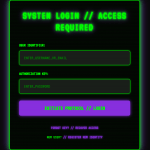
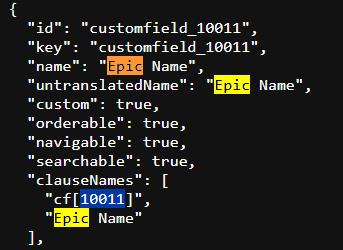
For EPIC NAME ID : Go to https://your-domain.atlassian.net/rest/api/3/field & search for epic name & note down the number inside cf (10011)

For REOPEN TRANSITION ID & CLOSE TRANSITION ID : Go to https://your-domain.atlassian.net/rest/api/3/issue/<Issue_ID>/transitions
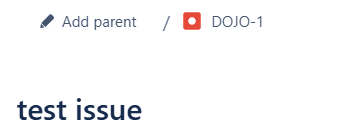
You need to add your Issue ID there, Just Create a test issue inside your project and you will get a issueID which get created from your project key, In this case DOJO-1
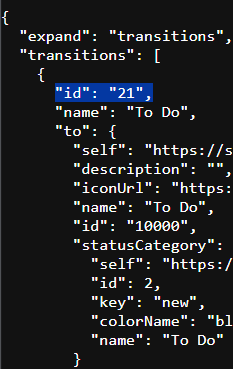
REOPEN TRANSITION ID = To Do
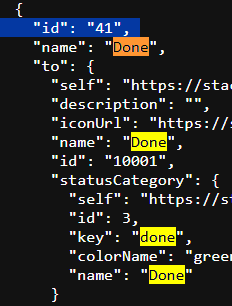
CLOSE TRANSITION ID = Done

3. 🧪 Test the Connection
- You can test the Jira connection by adding a new product into defectdojo and in the Jira section select the appropriate Jira instance and add the Project key
- If successful, you’ll see a ✅ confirmation
- If it fails:
- Check credentials
- Confirm Jira base URL and project key are correct
- Ensure the API token has sufficient access
🔄 Using the Integration
Once connected:
- When you add or update findings, you can push them to Jira
- Jira issues created this way will include:
- Title
- Description
- CVSS score or severity
- Links back to DefectDojo
You can configure auto-push or choose to push issues manually on a per-finding basis.
🚨 Common Issues & Fixes
| Problem | Cause | Fix |
|---|---|---|
Field 'summary' is required | Jira configuration is incomplete | Ensure all required fields are mapped |
| Cannot connect to Jira | Wrong URL or invalid token | Double-check URL and regenerate token |
| Issue type not found | Mismatched config | Make sure the issue type exists in Jira project |
🚀 Best Practices
- ✅ Map Jira issue types to DefectDojo severity levels
- ✅ Use tags to categorize issues (e.g., SAST, DAST, Cloud)
- ✅ Schedule periodic re-sync of Jira tickets
- ✅ Use the “Push to Jira” bulk action feature for faster workflows
Integrating DefectDojo with Jira helps bridge the gap between security and development teams, automating the flow of vulnerability data and improving remediation time.
Whether you’re running manual penetration tests or importing results from tools like Trivy, ZAP, or SonarQube, this integration ensures you never lose track of a critical finding again.
🔎 Want More?
- 💼 Official DefectDojo Docs on Jira Integration
- 🤝 Join the OWASP Slack Community
- 🧪 Unable to integrate? Contact us at Fiverr or Email Us